Electrochemical etching of stainless steel involves a precise and controlled process to achieve high-quality results. Below is an overview of the required equipment, estimated costs, and their specific purposes. The table also includes manufacturer information for reference.
Equipment Overview and Estimated Prices
Equipment Name
Estimated Price
Purpose
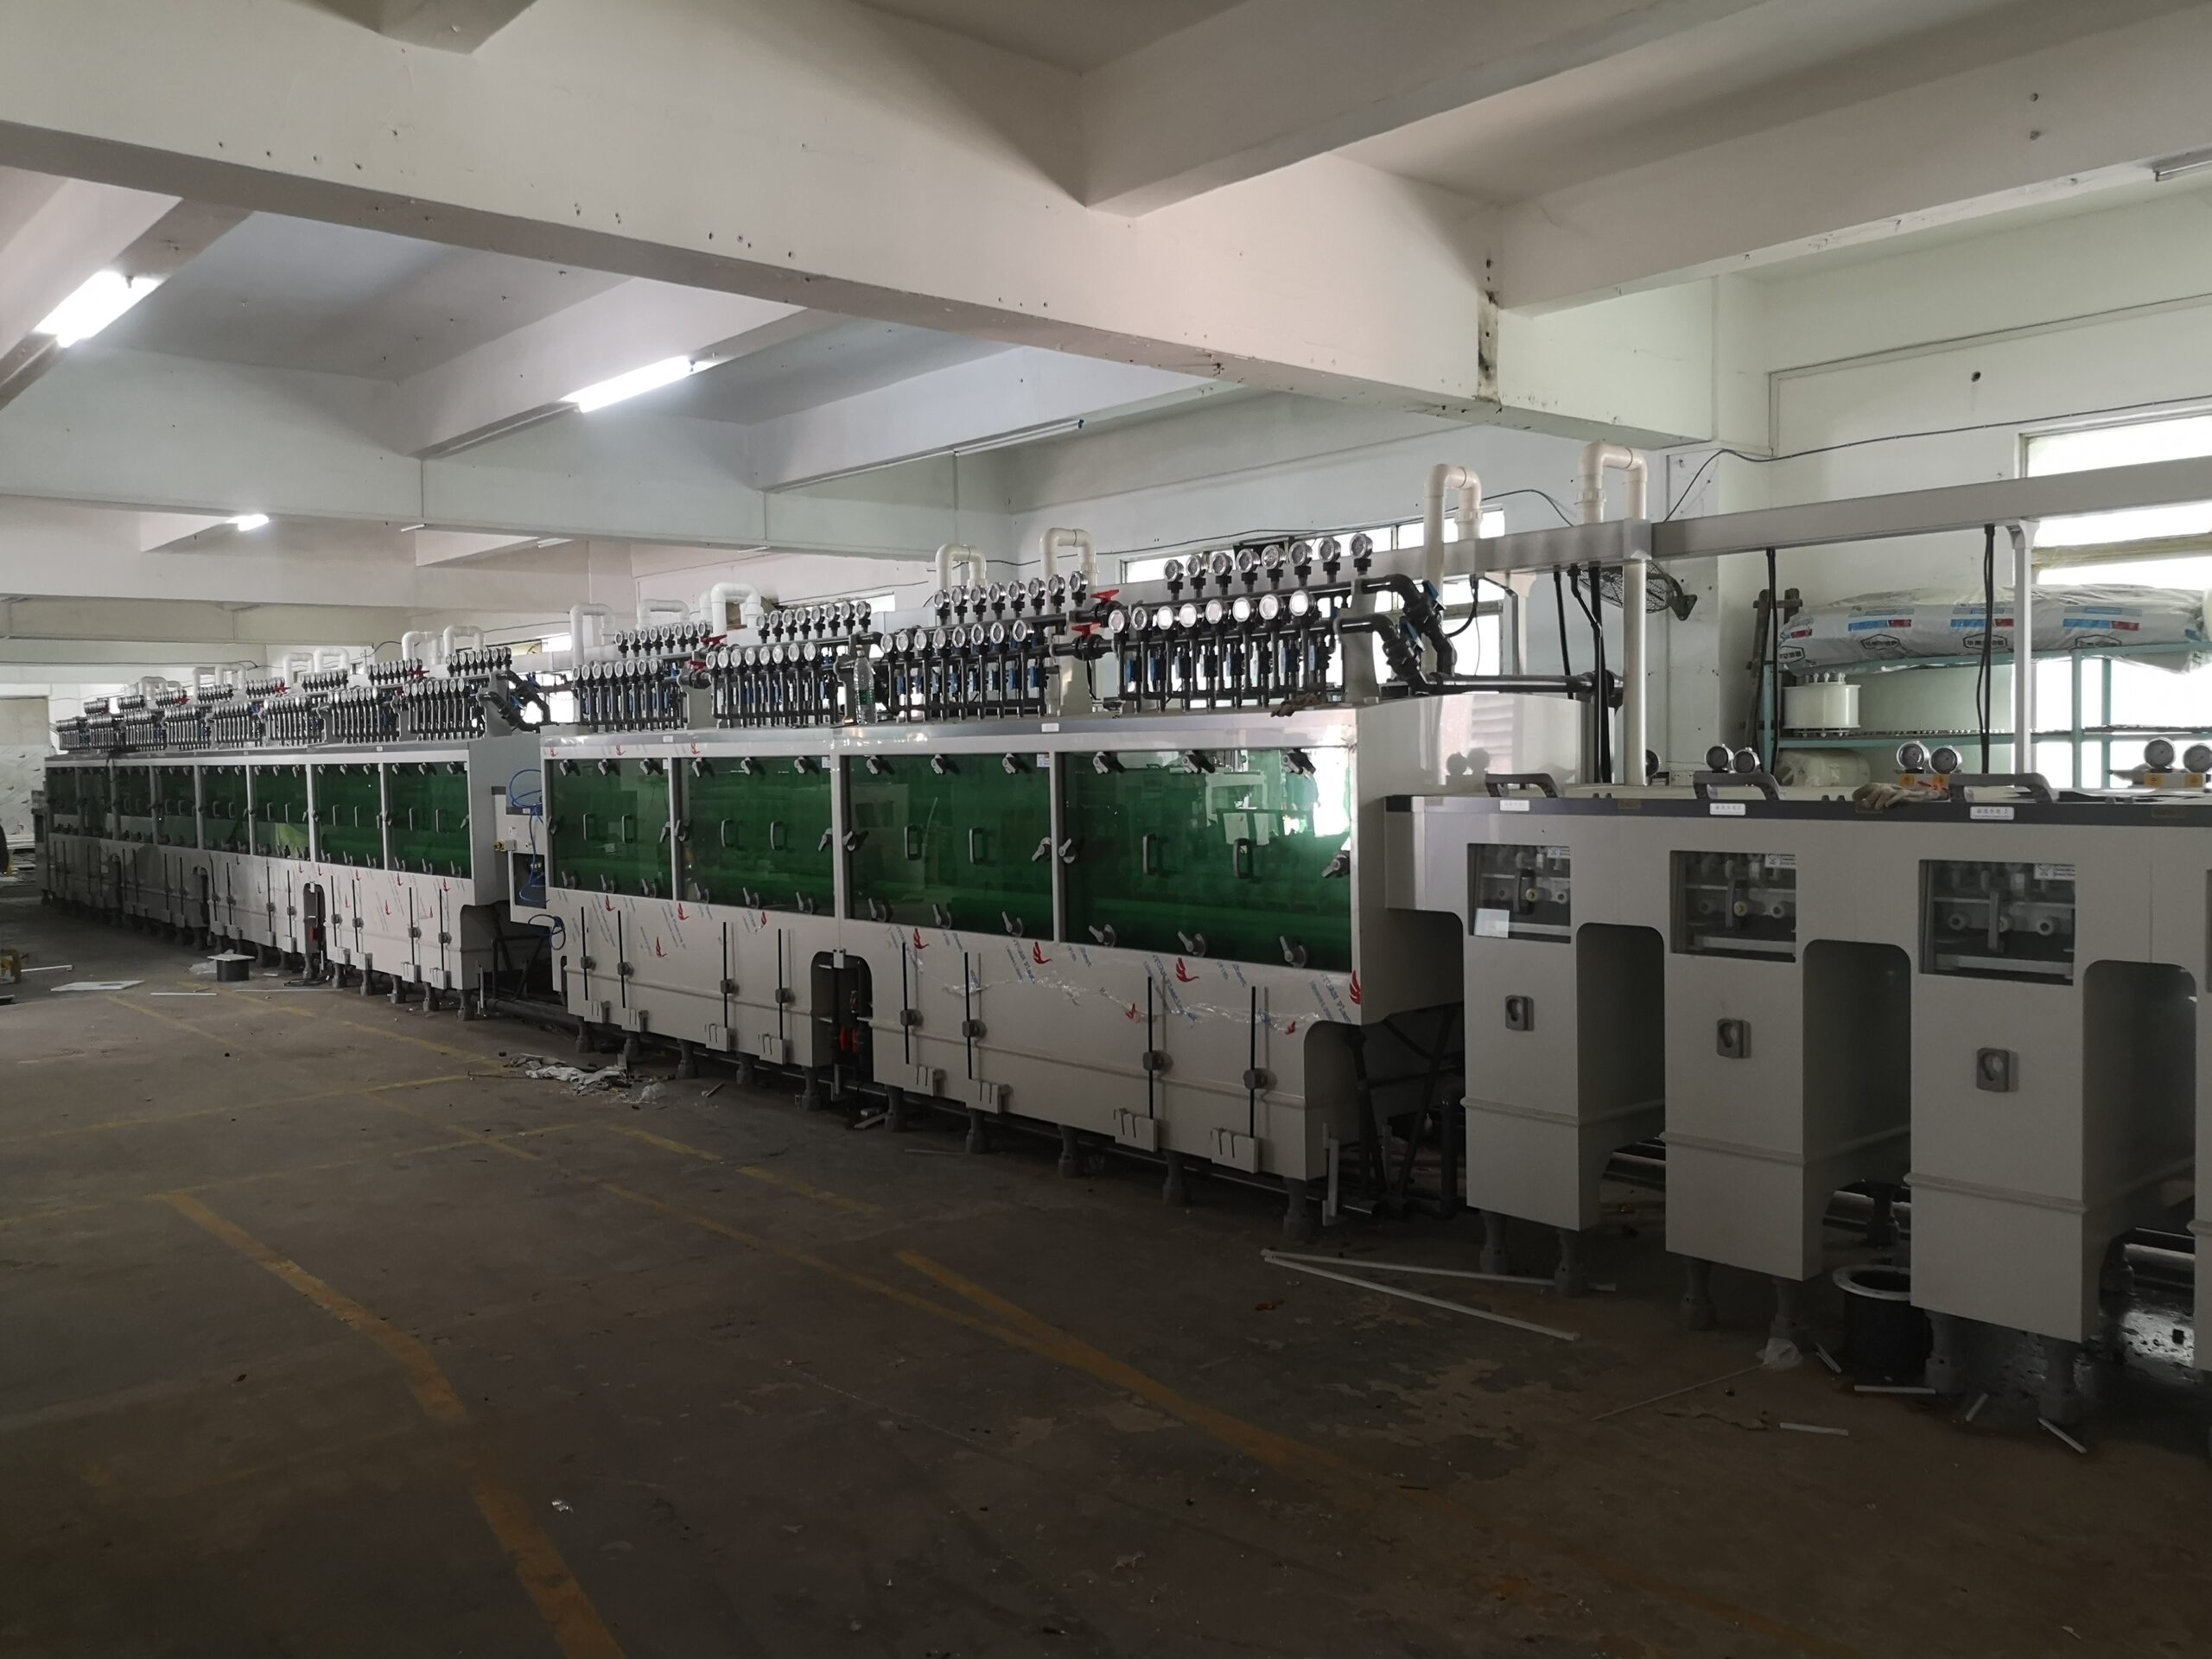
Stainless steel electro Cleaning line
$4500/m
Cleans stainless steel using specific water quality standards.
Detailed Steps of Stainless Steel Electrochemical Etching
Stainless Steel Electro Cleaning Line
Process: Utilizes high-quality water to remove contaminants from stainless steel.
Water Quality Recommendation: Use deionized water to prevent impurities.
Stainless Steel Electro Painting and Drying Line
Temperature Control: Precise control is crucial for uniform paint application.
Process Flow: Stainless steel is painted, then dried at controlled temperatures to ensure adhesion.
Exposure Line
LED Exposure: Suitable for less complex patterns; works by exposing photoresist-coated stainless steel to UV light.
LDI (Laser Direct Imaging): Ideal for high-precision patterns; uses laser beams for direct imaging.
Work Flow:
LED Exposure: Place the photoresist-coated steel under an LED light source.
LDI Exposure: Use laser beams to expose the steel, adjusting parameters for pattern complexity.
Developing Line
Post-Exposure: Develops the image after exposure by removing unexposed photoresist.
Necessity: Developing reveals the pattern created during the exposure phase.
Stainless Steel Electrochemical Etching Line
Process: Involves immersing the developed stainless steel into a copper chloride solution.
Parameters:
Temperature: Maintain between 40-50°C.
Etchant Concentration: Typically 15-20% copper chloride.
Experience Tips: Regularly monitor etchant strength and temperature for consistent results.
Stainless Steel Electro Stripping Line
Details: Strips away residual photoresist and other unwanted materials post-etching.
Procedure: Uses chemical baths or mechanical methods for cleaning.
Material and Etching Data Table
Stainless Steel Series
Etching Temperature (°C)
Etchant Concentration (%)
Estimated Etching Depth (µm)
Etching Quality
304
45
18
50
High
316
48
20
55
Very High
430
42
17
45
Medium
201
44
19
50
High
Material and Etching Data Table
This detailed overview covers the key aspects and equipment necessary for stainless steel electrochemical etching. Following these guidelines ensures efficient and high-quality etching results. For further information and specific product details, please visit DragonEtching.
Chemical etching is a versatile and precise manufacturing process used in various industries, such as electronics, aerospace, and automotive. It involves selectively removing material from a substrate using chemical solutions, or etchants, to create intricate and accurate designs. In this article, we will explore several commonly used etchants, their applications, and provide a step-by-step guide for setting the temperature, concentration, and other parameters when injecting an etchant into an etching machine.
Commonly Used Etchants
1. Ferric Chloride (FeCl3)
Applications:
Printed Circuit Boards (PCBs): Ferric chloride is widely used to etch copper traces on PCBs, creating the desired circuit patterns.
Metal Craftsmanship: Artists and metalworkers use ferric chloride to etch intricate designs onto metal surfaces.
Setting Parameters:
Temperature: Typically, the operating temperature for ferric chloride etching ranges from 35°C to 45°C (95°F to 113°F).
Concentration: A common concentration is around 40-45% ferric chloride in water. Ensure a consistent mix for optimal results.
Etching Time: Etching time can vary depending on the depth and complexity of the design but is typically in the range of 5-30 minutes.
Agitation: Adequate agitation ensures even etching and prevents the buildup of byproducts. Use an agitating mechanism within the etching machine.
2. Nitric Acid (HNO3)
Applications:
Stainless Steel: Nitric acid is used to etch stainless steel, making it useful in the manufacturing of medical instruments and aerospace components.
Integrated Circuits (ICs): In semiconductor fabrication, nitric acid is employed to etch silicon wafers, creating microelectronic structures.
Setting Parameters:
Temperature: Nitric acid etching is typically performed at lower temperatures, around 20°C to 30°C (68°F to 86°F).
Concentration: Common concentrations range from 10-70% nitric acid, depending on the material and desired etching rate.
Etching Time: Etching times can be as short as a few seconds for silicon wafers to several minutes for stainless steel.
Safety: Nitric acid is highly corrosive and should be handled with extreme care. Always use appropriate safety equipment and a well-ventilated workspace.
3. Sodium Hydroxide (NaOH)
Applications:
Silicon Dioxide (SiO2): Sodium hydroxide is used in the semiconductor industry to selectively etch silicon dioxide, allowing for the creation of microstructures.
Glass Etching: Artists and glassmakers use sodium hydroxide for glass etching to create decorative patterns.
Setting Parameters:
Temperature: Typically, sodium hydroxide etching is performed at elevated temperatures, ranging from 80°C to 90°C (176°F to 194°F).
Concentration: Concentrations vary but are often in the range of 5-20% sodium hydroxide.
Etching Time: Etching times can vary from a few minutes to several hours, depending on the desired depth and precision.
Setting Parameters in an Etching Machine
To ensure the successful operation of an etching machine, it is crucial to set the parameters correctly. Let’s use the example of etching a copper PCB with ferric chloride:
Temperature: Check the machine’s temperature control settings and set it to the desired range of 35°C to 45°C for ferric chloride etching.
Concentration: Prepare the etchant solution by measuring the correct amount of ferric chloride and mixing it with water to achieve the desired concentration (e.g., 40-45%). Use a calibrated measurement system to ensure accuracy.
Etching Time: Determine the appropriate etching time based on the complexity of your design. Start with a shorter time and gradually increase if needed. Typically, a 10-15 minute initial test run is a good starting point.
Agitation: Ensure that the etching machine has an agitation system in place to keep the etchant solution well-mixed during the process. Proper agitation prevents uneven etching.
Safety: Always follow safety protocols when working with chemicals. Wear appropriate personal protective equipment (PPE), such as gloves, goggles, and lab coats. Ensure that the workspace is well-ventilated and equipped with safety showers and eyewash stations.
Waste Disposal: Dispose of the used etchant solution properly in accordance with local regulations. Many etchants are hazardous waste and must be treated accordingly.
In conclusion, chemical etching is a precise and versatile manufacturing process used in various industries. Understanding the properties and applications of common etchants, as well as properly setting parameters in an etching machine, is essential for achieving high-quality results while ensuring safety and environmental compliance. Whether you’re creating intricate PCBs or crafting artistic designs on metal and glass, chemical etching offers a powerful tool for precise material removal.
Chemical milling, also known as chemical machining or chem-milling, is a manufacturing process used to selectively remove material from the surface of a workpiece using chemical reactions. This process is typically used to shape and finish metal parts and is particularly useful for producing complex and intricate shapes that are difficult or costly to achieve using traditional mechanical machining methods like milling, turning, or grinding.
Learn about the entire chemical milling process in this video
Here’s how chemical milling generally works:
Masking: A protective mask or resist material is applied to the surface of the workpiece. This mask is typically made of materials that are resistant to the chemical etchant used in the process. The mask is precisely designed to expose only the areas of the workpiece that need to be chemically milled, leaving the rest of the surface protected.
Etching: The workpiece, with the mask in place, is immersed in a chemical etchant bath. The etchant is a corrosive solution that reacts with the exposed metal surfaces but does not affect the masked areas. The etchant removes material from the exposed areas by dissolving it through chemical reactions.
Rinse and Finish: After a predetermined amount of time, the workpiece is removed from the etchant bath and thoroughly rinsed to stop the chemical reaction. The mask is then removed, revealing the finished part. Additional finishing processes such as cleaning, deburring, or surface treatment may be necessary to achieve the desired final product.
Chemical milling offers several advantages, including the ability to produce parts with high precision, intricate geometries, and fine details. It is often used in aerospace and automotive industries to manufacture components like aircraft engine blades, turbine disks, and intricate parts for fuel systems.
how chemical milling works
Chemical milling, also known as chemical machining or chem-milling, is a subtractive manufacturing process used to selectively remove material from the surface of a workpiece through chemical reactions. The process typically involves the following steps:
Masking: A protective mask or resist material is applied to the surface of the workpiece. This mask is designed to cover and protect the areas of the workpiece where material should not be removed during the chemical milling process. The mask is often made of materials that are resistant to the chemical etchant used in the process.
Exposure: The masked workpiece is exposed to a chemical etchant. The etchant is a corrosive solution or chemical mixture that reacts with and dissolves the exposed metal surfaces of the workpiece. The specific etchant used depends on the material being processed and the desired rate of material removal.
Etching: As the workpiece is immersed in the etchant, the chemical reactions between the etchant and the exposed metal surfaces result in the removal of material. The etching process selectively removes material from the exposed areas while leaving the masked areas unaffected. The rate of material removal can be controlled by factors such as the concentration of the etchant, the temperature of the etchant bath, and the immersion time.
Rinse and Neutralization: After a predetermined amount of time or when the desired depth of material removal is achieved, the workpiece is removed from the etchant bath. It is then thoroughly rinsed to stop the chemical reaction. Rinsing helps remove any residual etchant and prevent further material removal. In some cases, a neutralization step may be required to neutralize any remaining acidic or alkaline residues.
Mask Removal: The protective mask or resist material is removed from the workpiece, revealing the final part with the desired shape and features.
Post-processing: Depending on the application and the final part requirements, additional post-processing steps such as cleaning, deburring, and surface finishing may be performed to achieve the desired surface quality and tolerances.
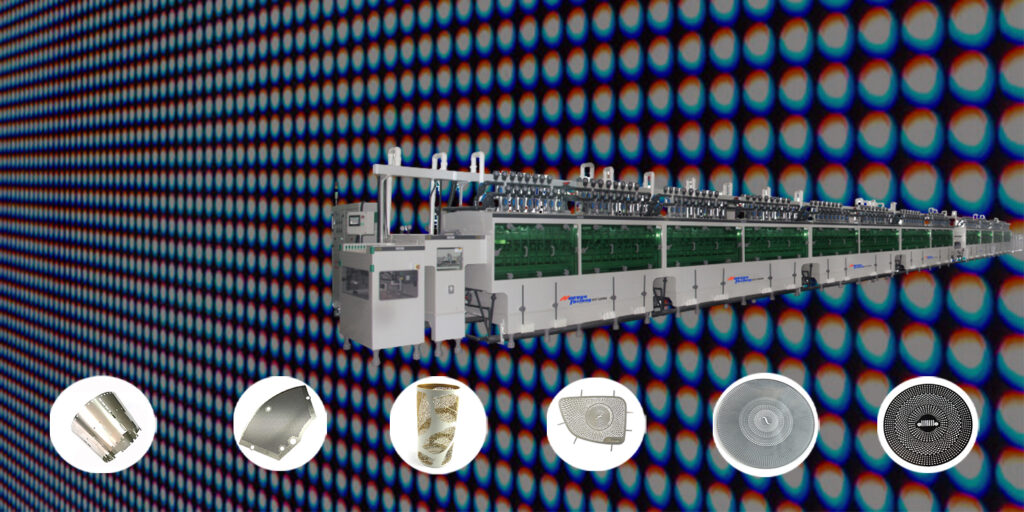
Chemical Milling Equipment
The equipment used in the production of high-precision metals and the details of how each piece of equipment works in the production of high-precision metals. Click to learn more.
Acid etching, also known as photo etching, chemical etching or chemical milling, is a sheet metalworking technology which uses acid etchants to machine complex, highly accurate precision metal components.
Acid etching machines are used to remove material from metal parts using acid. The process involves the following steps:
Preparation: The metal part is cleaned thoroughly to remove any dirt, grease, or contaminants from the surface. This is important to ensure proper adhesion of the acid and uniform results.
Masking: Areas that should be protected from the acid are covered using a mask or a resist material. This could be done by applying a special adhesive film or using a resist pen to draw the desired pattern on the part.
Acid application: The prepared metal part is then placed in the acid etching machine. The machine consists of a tank filled with a suitable acid solution such as ferric chloride or hydrochloric acid. The part is submerged in the acid solution, and the time and temperature are controlled depending on the desired depth and speed of etching.
Etching process: The acid dissolves the exposed metal surface, creating a recessed pattern or design. The depth and quality of the etch can be controlled by adjusting the time, temperature, and concentration of the acid solution.
Rinsing and neutralizing: Once the desired etching is achieved, the metal part is removed from the acid solution and thoroughly rinsed with water to remove any residual acid. It is then neutralized using a neutralizing agent to stop the etching process and prevent further reaction with the metal.
Finishing: After the etching process, the resist material is removed, and the metal part is cleaned, dried, and polished if necessary. This reveals the etched pattern or design on the metal surface.
It is important to follow safety procedures and use appropriate protective equipment when working with acid
What does owning an acid etching machine do?
Owning an acid etching machine allows you to perform acid etching processes on metal parts at your own facility. This offers several benefits:
Customization: With an acid etching machine, you have the freedom to customize metal parts according to your specific requirements. You can etch intricate designs, logos, serial numbers, or any desired patterns onto the metal surface. This allows for personalization and branding opportunities.
Prototyping and product development: Acid etching machines enable you to quickly and efficiently create prototypes or test different designs on metal parts. This helps in the product development process by allowing you to evaluate aesthetics, functionality, and fit before committing to large-scale production.
Production control: Owning an acid etching machine gives you control over the production process. You can etch metal parts in-house, ensuring quality control, shorter lead times, and reduced dependency on external suppliers. This can be particularly useful for businesses that require custom or small-batch production.
Cost savings: By owning an acid etching machine, you can eliminate the need for outsourcing etching services, which can be costly and time-consuming. In the long run, this can lead to cost savings and improved efficiency.
Versatility: Acid etching machines can be used on a wide range of metals, including stainless steel, aluminum, brass, copper, and more. This versatility allows you to work with different materials and expand your applications.
However, it is important to note that owning an acid etching machine also requires proper knowledge, training, and adherence to safety guidelines to ensure the safe handling and disposal of acids involved in the process.
What metals can an acid etcher etch?
Stainless steel: Acid etching can be used to create intricate designs, patterns, logos, or text on stainless steel surfaces, commonly used in the fabrication of kitchen appliances, automotive parts, and architecture.
Aluminum: Acid etching can be applied to aluminum surfaces to etch designs, text, or even photographs. It is commonly used in industries such as aerospace, signage, and decorative applications.
Brass: Brass can be etched using acid to create decorative patterns, logos, or designs. Acid etching on brass is often used in jewelry, nameplates, or decorative items.
Copper: Acid etching can be used on copper surfaces to create artistic designs, engravings, or patterns. It is commonly employed in the production of artworks, sculptures, and electrical components.
Nickel: Acid etching can be employed on nickel surfaces for various purposes, such as decorative elements, prototypes, or to create specific surface textures.
Zinc: Acid etching can be used on zinc surfaces to create intricate designs, textures, or patterns. It is often employed in architectural applications and the production of decorative items.
What do I need to know about acid-etched metal design?
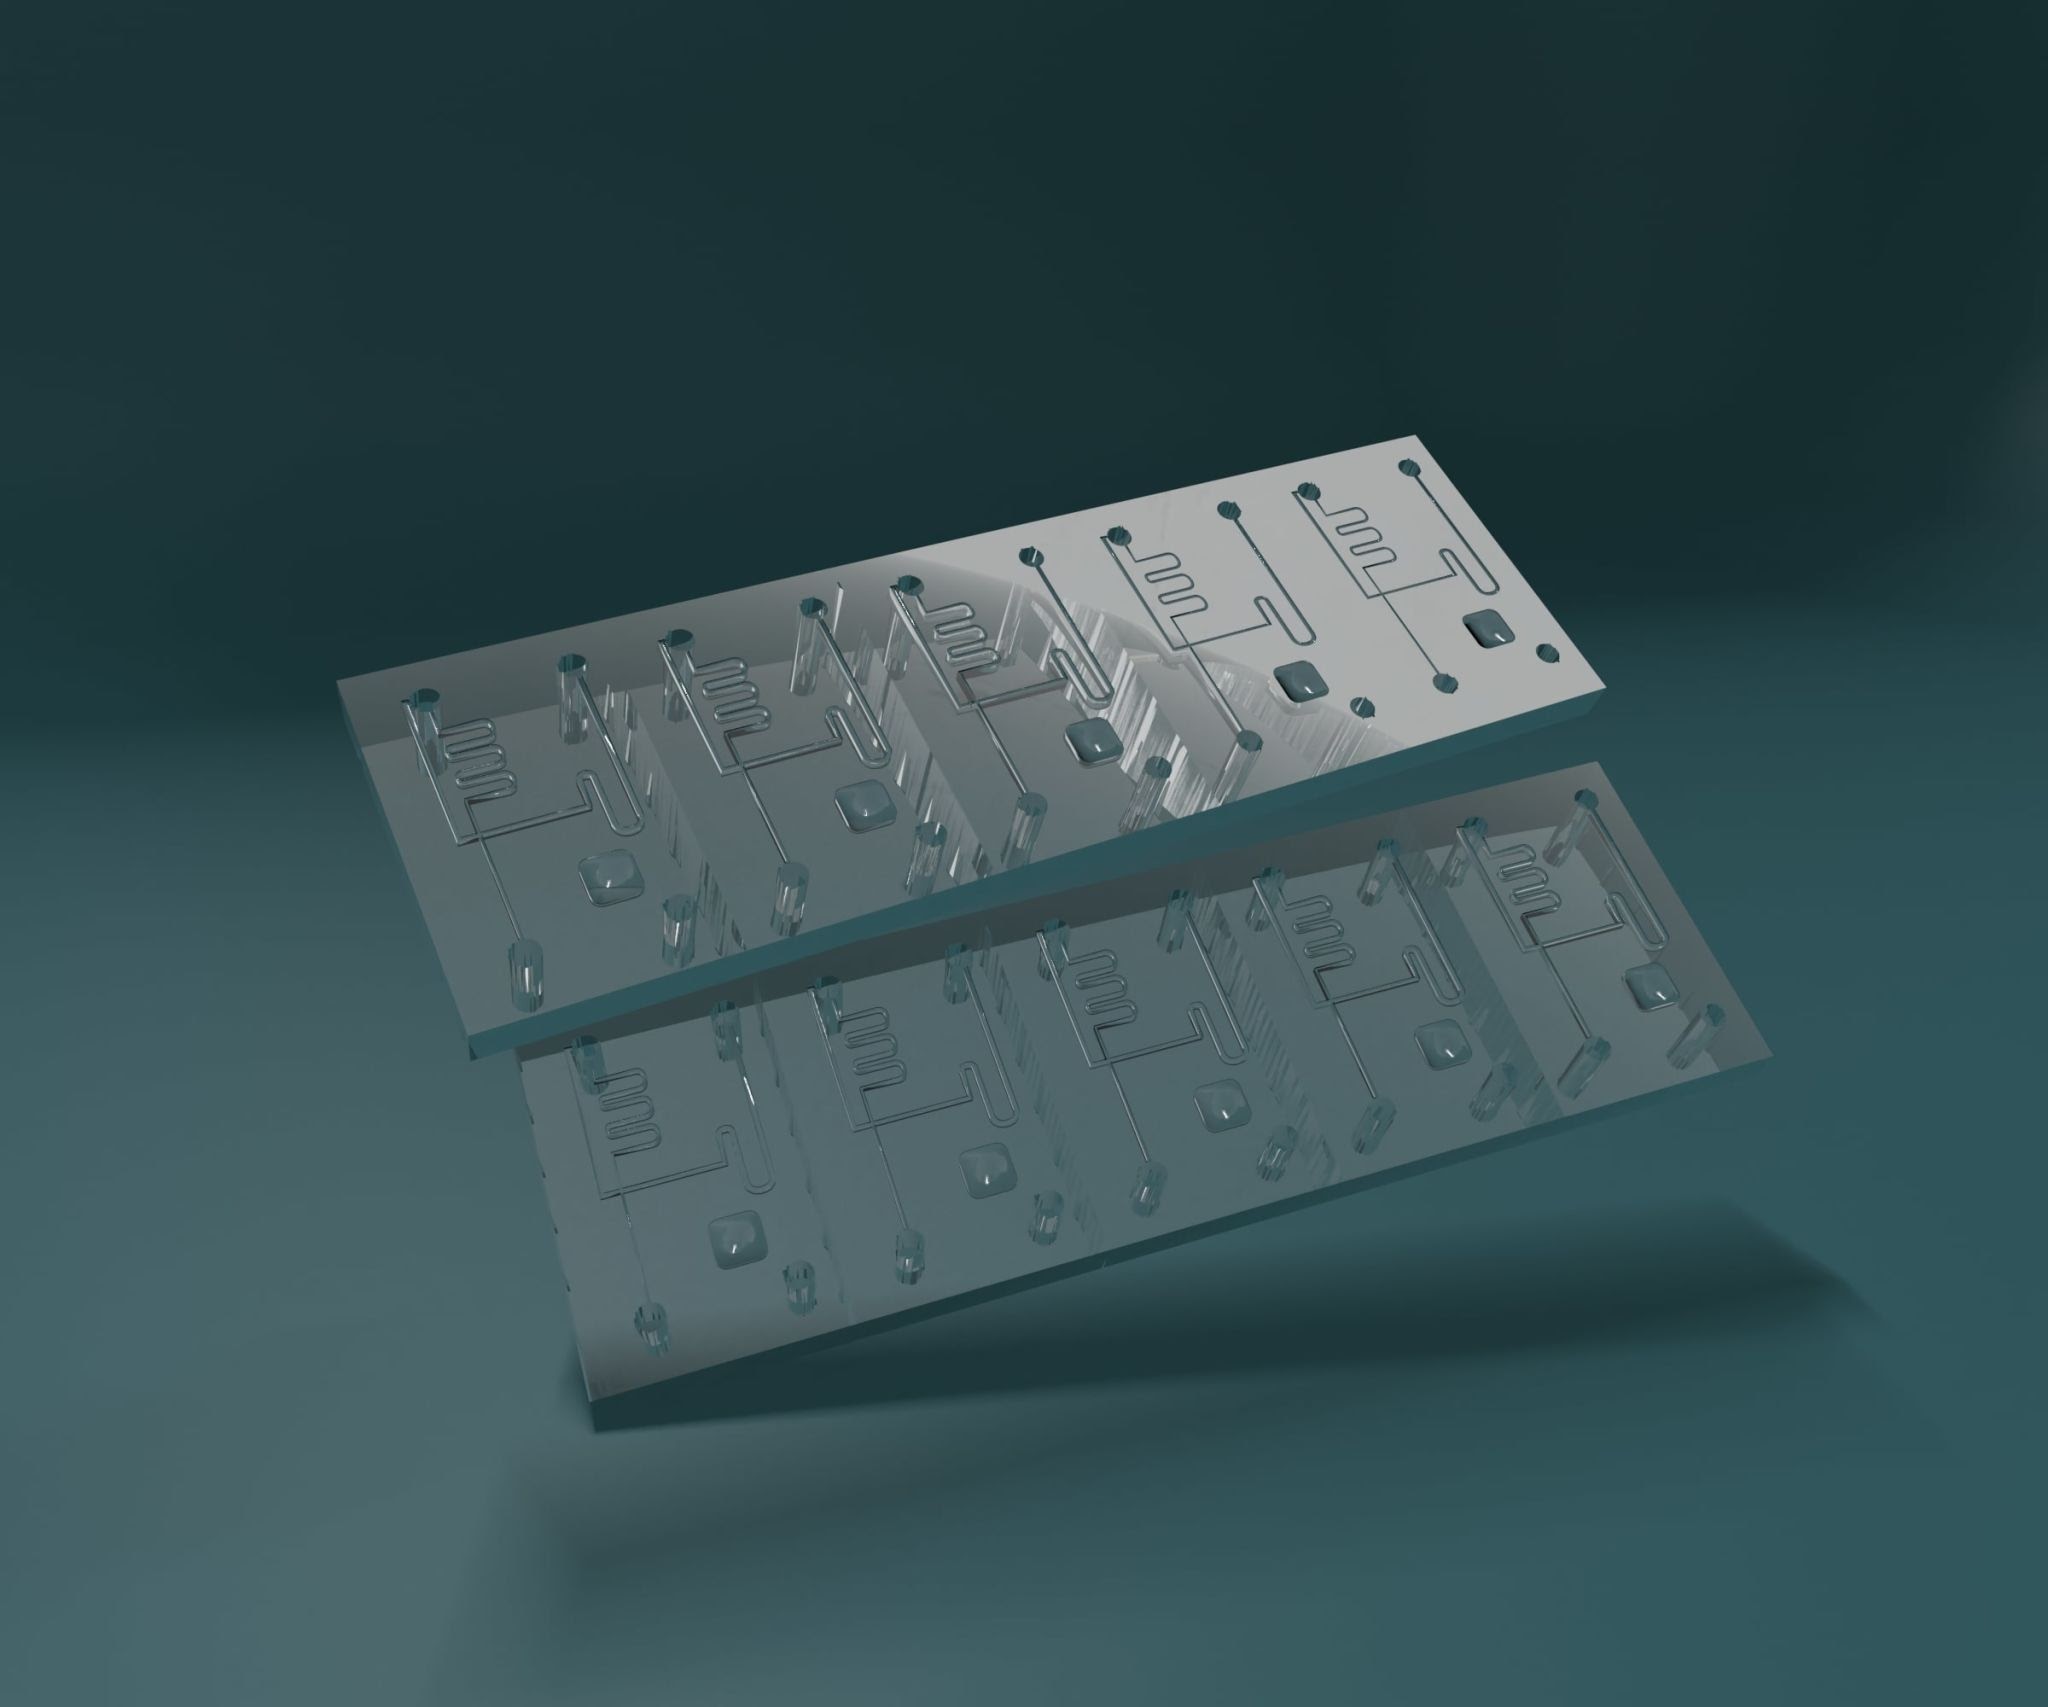
Assumptions Matter: Before delving into the design criteria, it’s crucial to set the right assumptions. For instance, in the case of wet etching, we assume a specific thickness. For the purpose of this discussion, let’s consider a thickness ranging from 0.1mm.
Etching design formulas versus material thickness: Assuming a material thickness of 0.1mm, one of the first design criteria to consider is the hole diameter. To ensure proper etching, it’s often recommended to make the hole slightly larger than the material thickness. In this case, 1.2 times the material thickness would be 0.1mm * 1.2 = 0.12mm. Therefore, if the material thickness is 0.1mm, the hole should be designed to have a diameter of at least 0.12mm.
Material Choice: The choice of material plays a significant role in wet etching. Different materials react differently to etchants. Engineers must select materials that are compatible with the chosen etchant to ensure a successful process.
Hole Size Matters: The size of the holes created during wet etching is a critical design criterion. Smaller holes may lead to incomplete material removal, while larger holes may compromise structural integrity. Typically, materials with a thickness of 100μm or less can accommodate holes with a diameter of 0.12mm or more. Larger holes often result in more aesthetically pleasing and structurally sound outcomes.
Alignment and Precision: Achieving precise alignment of the etched features is vital. Design drawings should incorporate alignment markers or registration features to ensure accurate positioning during the etching process. This is particularly crucial when dealing with multilayer structures or when specific patterns must be aligned with pre-existing features.
Minimum Feature Size: It’s advisable to establish a minimum feature size for your design drawings. For instance, it’s generally recommended that no marked details be smaller than 0.1mm. This corresponds to 100μm. Maintaining a minimum feature size helps ensure that the etching process can accurately replicate the desired patterns and structures without the risk of incomplete or distorted etching.
Quality Control and Inspection: Design criteria should include provisions for quality control and inspection during and after the wet etching process. This involves specifying methods and tools for verifying that the final product meets the intended design specifications. Inspection processes may include optical microscopy, surface profilometry, or other measurement techniques to validate critical dimensions and surface finish.
Wet film etching is another key technique in the precision metal etching process, offering an alternative approach to achieving fine patterns and features on thin metal substrates.
1. Substrate Preparation:
Just like in dry film etching, the process begins with a clean metal substrate. The substrate is typically cleaned to remove any contaminants, ensuring proper adhesion of the photoresist layer.
2. Application of Photoresist:
Instead of dry film resist, wet film etching utilizes a liquid photoresist. The photoresist is applied to the metal substrate by various methods such as spin coating, dip coating, or spray coating. It forms a thin, uniform layer over the entire surface.
3. Soft Baking:
After the photoresist is applied, it undergoes a soft baking process. This step involves heating the substrate to remove solvent and to ensure the photoresist adheres well to the metal surface.
4. Exposure to UV Light:
A photomask or phototool is used to project a specific pattern onto the photoresist-coated substrate. The exposed areas of the photoresist become chemically altered and become either more or less soluble depending on the type of photoresist used.
5. Development:
The substrate is then immersed in a developer solution. The developer removes the soluble regions of the photoresist, revealing the underlying metal surface in a pattern that corresponds to the exposed areas of the photoresist.
6. Etching:
The substrate, with the developed photoresist pattern, is immersed in an etching solution, which chemically removes the exposed metal areas. The etching solution can be an acid or alkaline solution depending on the specific metal being etched. Similar to dry film etching, the etchant selectively dissolves the metal while leaving the protected areas covered by the photoresist untouched.
7. Rinsing and Inspection:
After etching, the substrate is thoroughly rinsed to remove any remaining etchant and residual photoresist. The etched features are inspected for accuracy and quality at this stage.
8. Stripping of Photoresist:
The photoresist is typically removed after etching. This can be done using a solvent that dissolves the photoresist without affecting the etched metal features.
9. Additional Processing (Optional):
Depending on the specific application, additional processes such as passivation, plating, or other post-etch treatments may be applied to the metal substrate to enhance its properties or protect it from environmental factors.
10. Final Inspection and Quality Control: – The finished metal component undergoes a final inspection to ensure that the etched features meet the required specifications and quality standards. This may involve measurements, visual inspections, and other quality control procedures.
Wet film etching offers many of the same advantages as dry film etching, including high precision, customization, and compatibility with various metal substrates. However, it has its own set of considerations and requirements, such as the need for liquid photoresists and precise control of the coating and soft baking processes. Wet film etching is commonly used in industries that require intricate metal components and where the flexibility of using liquid photoresists is beneficial.
Wet film etching, as an alternative to dry film etching, possesses several distinctive features and advantages, making it suitable for specific applications.
Homogeneous Coating Thickness:
Wet film etching allows for the deposition of a highly uniform and consistent photoresist layer on the metal substrate. This results in even etching across the entire surface, reducing variations and defects in the final product.
Excellent Adhesion:
Liquid photoresists can offer strong adhesion to metal substrates, ensuring that the resist adheres firmly during the etching process. This helps maintain the integrity of the mask pattern and prevents delamination.
Variety of Photoresists:
Wet film etching can use a wide range of photoresist types, including positive and negative photoresists, each with its own characteristics. This versatility allows for the selection of the most suitable resist for the specific application.
Versatile Substrate Compatibility:
Wet film etching is compatible with various metals and alloys, similar to dry film etching. This versatility enables manufacturers to choose the material that best suits their requirements.
Multi-Layer Etching:
In some cases, wet film etching can be used for multi-layer etching processes where different metals or materials are etched sequentially, allowing for complex component manufacturing.
High Aspect Ratio Etching:
Wet film etching can achieve high aspect ratio features, meaning it is capable of etching deep, narrow channels or holes in metal substrates. This is crucial for certain microfabrication applications and MEMS devices.
Controllable Etching Rate:
The etching rate in wet film etching can often be precisely controlled by adjusting parameters such as etchant concentration, temperature, and agitation. This control is important for achieving specific etching depths or feature dimensions.
Rapid Prototyping:
Wet film etching is suitable for rapid prototyping and small-batch production, providing a quicker turnaround time compared to some other metal fabrication methods.
Minimal Tool Wear:
Since wet film etching is a chemical process, it does not involve physical tooling or machining. Consequently, there is no tool wear, which can be advantageous for maintaining consistent quality over time.
Environmental Considerations:
Similar to dry film etching, wet film etching is generally considered environmentally friendly as it does not produce significant hazardous waste or emissions, particularly when using environmentally friendly developer and etchant solutions.
Integration with Other Processes:
Wet film etching can be easily integrated into larger manufacturing processes, making it compatible with subsequent steps such as plating, passivation, or additional patterning steps.
Quality Control and Inspection:
Wet film etching, like dry film etching, allows for rigorous quality control and process monitoring, ensuring that final components meet specified tolerances and standards.
Wet Film Precision Metal Etching Process and Machine Video
Wet Film Precision Metal Etching Process:
Equipment:
Coater for Wet Film Resist:
Purpose: Used to evenly apply a wet film resist onto the metal surface.
Drying Oven:
Purpose: Dries the wet film resist after application, ensuring proper adhesion and consistency.
UV Exposure Unit:
Purpose: Exposes the dried wet film resist to UV light through a photomask, creating a pattern on the resist.
Developer:
Purpose: Contains a chemical solution that removes the unexposed portions of the wet film resist, revealing the metal surface beneath.
Etching Machine:
Purpose: Selectively removes metal from the exposed areas using chemical etching solutions, creating the desired pattern.
Stripping Machine:
Purpose: Removes any remaining wet film resist from the metal surface after etching.
Workflow:
Metal Cleaning:
Clean the metal sheet or component to remove impurities and contaminants.
Wet Film Resist Application:
Place the metal sheet or component in the coater.
Apply the wet film resist evenly onto the cleaned metal surface. This resist is typically a liquid that covers the entire surface.
Drying:
Transfer the metal with the applied wet film resist to a drying oven.
The oven dries the resist, evaporating any solvents and ensuring that the resist adheres properly to the metal.
Exposure:
Place the metal with the dried wet film resist under the UV exposure unit.
Expose the resist to UV light through a photomask that carries the desired pattern. The UV light cures the resist in the exposed areas, making it resistant to etching.
Development:
Transfer the exposed metal to the developer.
The developer contains a chemical solution that dissolves the unexposed portions of the wet film resist, revealing the metal surface underneath. This reveals the pattern for etching.
Etching:
Immerse the metal into the chemical etching machine containing the etching solution.
The chemical selectively removes the exposed metal areas, leaving the protected areas intact. Etching continues until the desired depth or pattern is achieved.
Rinsing and Cleaning:
Rinse the metal thoroughly with water or a suitable rinse solution to remove etching chemicals and residues.
Stripping (if needed):
Use a stripping machine or stripping chemicals to remove any remaining wet film resist from the metal surface. This step ensures a clean, finished product.
Final Inspection:
Inspect the etched metal for quality, accuracy, and adherence to specifications.
Any necessary post-processing or quality control checks are performed at this stage.
The wet film precision metal etching process is suitable for applications where fine details and intricate patterns are required. It offers an alternative to dry film etching and is commonly used in industries such as electronics, microfabrication, and precision engineering.
If you are interested in finding out about Wet Film Metal Etching Equipment overall price. Please do not hesitate to contact us. Usually we will contact you within 2 days after we receive your information.
Dry film etching is a crucial step in the precision metal etching process, which is a highly precise and controlled technique for creating intricate patterns and features on thin metal sheets or foils. This process is often used in various industries, including electronics, aerospace, medical devices, and more, where precision and accuracy are paramount.
Here are some additional features and aspects to consider about dry film etching:
High Precision and Accuracy:
Dry film etching is known for its exceptional precision and accuracy. It can create intricate and finely detailed patterns with tolerances as tight as a few micrometers. This level of precision is essential for manufacturing components used in electronics and other high-tech applications.
Cost-Effective for Prototyping and Small Production Runs:
Dry film etching is well-suited for prototyping and small production runs. Unlike some other manufacturing processes that require expensive tooling or molds, dry film etching is more cost-effective for producing small quantities of complex metal parts.
Customization and Design Flexibility:
Design changes can be implemented relatively easily in the dry film etching process. Since it involves exposing a resist to a mask, altering the mask design allows for rapid changes in the final etched pattern. This flexibility is advantageous when designing custom components.
Material Compatibility:
Dry film etching is compatible with various metals and alloys, including stainless steel, copper, aluminum, and more. This versatility allows manufacturers to choose the material that best suits the application’s requirements.
No Tool Contact:
Unlike some traditional machining processes that involve physical tooling, dry film etching is a non-contact method. This eliminates the risk of tool wear and damage to the substrate, making it ideal for delicate or thin materials.
Minimal Heat Generation:
Dry film etching is a cold-etching process, meaning it does not generate significant heat during the etching stage. This lack of thermal stress minimizes the risk of material distortion or warping, which is particularly important for thin metal foils.
Burr-Free and Stress-Free Etching:
The process produces burr-free edges and stress-free parts. This is crucial for components used in sensitive applications like microelectronics and medical devices, where sharp edges or residual stress can be problematic.
Scalability:
Dry film etching can be scaled up for larger production volumes when needed. This scalability makes it adaptable for both small-scale and large-scale manufacturing.
Environmental Considerations:
Dry film etching is generally considered to be a more environmentally friendly process compared to some other metal fabrication methods, as it does not produce large quantities of hazardous waste or emissions.
Quality Control and Process Monitoring:
Due to its precision, dry film etching allows for robust quality control and process monitoring. Manufacturers can closely monitor each step of the process to ensure that the final components meet the required specifications.
Wide Range of Applications:
Dry film etching is used in diverse industries, including electronics for printed circuit boards (PCBs), microelectromechanical systems (MEMS), sensors, medical devices, aerospace components, and more. Its versatility makes it applicable in various fields.
Overall, dry film etching is a highly specialized and valuable manufacturing process that excels in producing precise, intricate metal components while offering flexibility and cost-effectiveness for both small-scale and large-scale production.
Dry Film Metal Etching Equipment:
Metal Cleaning Machine:
Purpose: Used to clean the metal surface, removing contaminants to ensure proper adhesion of the dry film resist.
Pressure Layer Machine:
Purpose: Precisely applies the dry film resist onto the metal surface, ensuring uniform adhesion and thickness.
Exposure Machine:
Purpose: Exposes the dry film resist to UV light through a photomask, creating a pattern on the resist.
Developer:
Purpose: Contains a chemical solution that removes the unexposed portions of the dry film resist, revealing the metal surface beneath.
Etching Machine:
Purpose: Selectively removes metal from the exposed areas using chemical etching solutions, creating the desired pattern.
Stripping Machine:
Purpose: Removes any remaining dry film resist from the metal surface after etching.
Precision Metal Etching Process Video
Dry Film Metal Etching Workflow:
Metal Cleaning:
Clean the metal sheet or component to remove impurities and contaminants.
Pressure Layer:
Apply the dry film resist onto the cleaned metal surface using the pressure layer machine. Ensure uniform adhesion and thickness.
Exposure:
Place the metal with the dry film resist under the exposure machine.
Expose the resist to UV light through a photomask that carries the desired pattern.
Development:
Transfer the exposed metal to the developer, which removes the unexposed resist, exposing the metal underneath.
Etching:
Immerse the metal into the chemical etching machine containing the etching solution. The chemical selectively removes the exposed metal areas, leaving the protected areas intact.
Rinsing and Cleaning:
Rinse the metal thoroughly to remove etching chemicals and residues.
Stripping (if needed):
Use stripping chemicals to remove any remaining masking material (resist) from the metal surface.
Final Inspection:
Inspect the etched metal for quality and accuracy.
If you are interested in finding out about Dry Film Metal Etching Equipment overall price. Please do not hesitate to contact us. Usually we will contact you within 2 days after we receive your information.
Precision Metal Etching Process: The Precision Metal Etching Process is a sophisticated manufacturing method used to selectively remove metal from thin sheets or foils with high accuracy, creating intricate and precise patterns.
Photoresist Application Machine:
Purpose: Applies a uniform layer of photoresist onto metal sheets for protection and pattern transfer.
Detailed Workflow:
Load clean, flat metal sheets or foils onto the machine’s conveyor system.
A precision dispensing system applies a uniform layer of photoresist onto the metal surface.
The coated metal sheets are transported through a drying mechanism to ensure even and complete drying.
Photomask Alignment System:
Purpose: Ensures accurate alignment of photomasks with metal sheets for precise pattern transfer.
Detailed Workflow:
Metal sheets with photoresist are aligned with photomasks using precision optical or mechanical alignment systems.
The alignment system ensures that the photomask is accurately positioned over the metal sheet to transfer the desired pattern during exposure.
UV Exposure Unit:
Purpose: Exposes the photoresist to UV light, hardening it and protecting it from etching.
Detailed Workflow:
The aligned metal sheets and photomasks are exposed to UV light in a controlled environment.
The UV light hardens the photoresist in areas not covered by the photomask, effectively creating a protective mask on the metal surface.
Chemical Etching Machine:
Purpose: Selectively removes metal from exposed areas of the metal sheets to create the desired pattern.
Detailed Workflow:
Metal sheets with hardened photoresist are immersed in a chemical etchant bath.
The etchant reacts with and dissolves the unprotected metal, leaving behind the desired pattern.
The etchant bath’s temperature, concentration, and agitation are carefully controlled for precise etching.
The etching process is closely monitored to achieve the desired depth and precision.
Rinsing and Drying Station:
Purpose: Removes residual etchant and ensures clean, dry metal components.
Detailed Workflow:
After etching, metal sheets are carefully removed from the etchant bath.
The sheets are rinsed in clean water to remove any remaining etchant.
A drying mechanism, such as hot air or infrared heating, thoroughly dries the metal sheets.
Quality Inspection Equipment:
Purpose: Verifies the accuracy and quality of the etched metal components.
Detailed Workflow:
Precision measurement tools, optical inspection systems, and quality control checks are employed to ensure that the etched components meet required specifications.
Measurements are taken to confirm dimensional accuracy, and optical inspections verify the quality of the etched pattern.
Manufacturer Recommendation: For precision metal etching services, one highly regarded manufacturer is DragonEtching. They offer the following advantages:
Extensive Experience: DragonEtching has over 50 years of experience in precision metal etching, making them a trusted industry leader.
Advanced Technology: They utilize state-of-the-art photochemical etching processes and equipment to ensure high precision and quality.
Customization: DragonEtching specializes in custom etching solutions, allowing for intricate and complex patterns tailored to customer specifications.
Quality Assurance: The company is ISO 9001:2015 certified, demonstrating their commitment to quality and precision.
Diverse Materials: DragonEtching can etch a wide range of materials, including copper, stainless steel, and more.
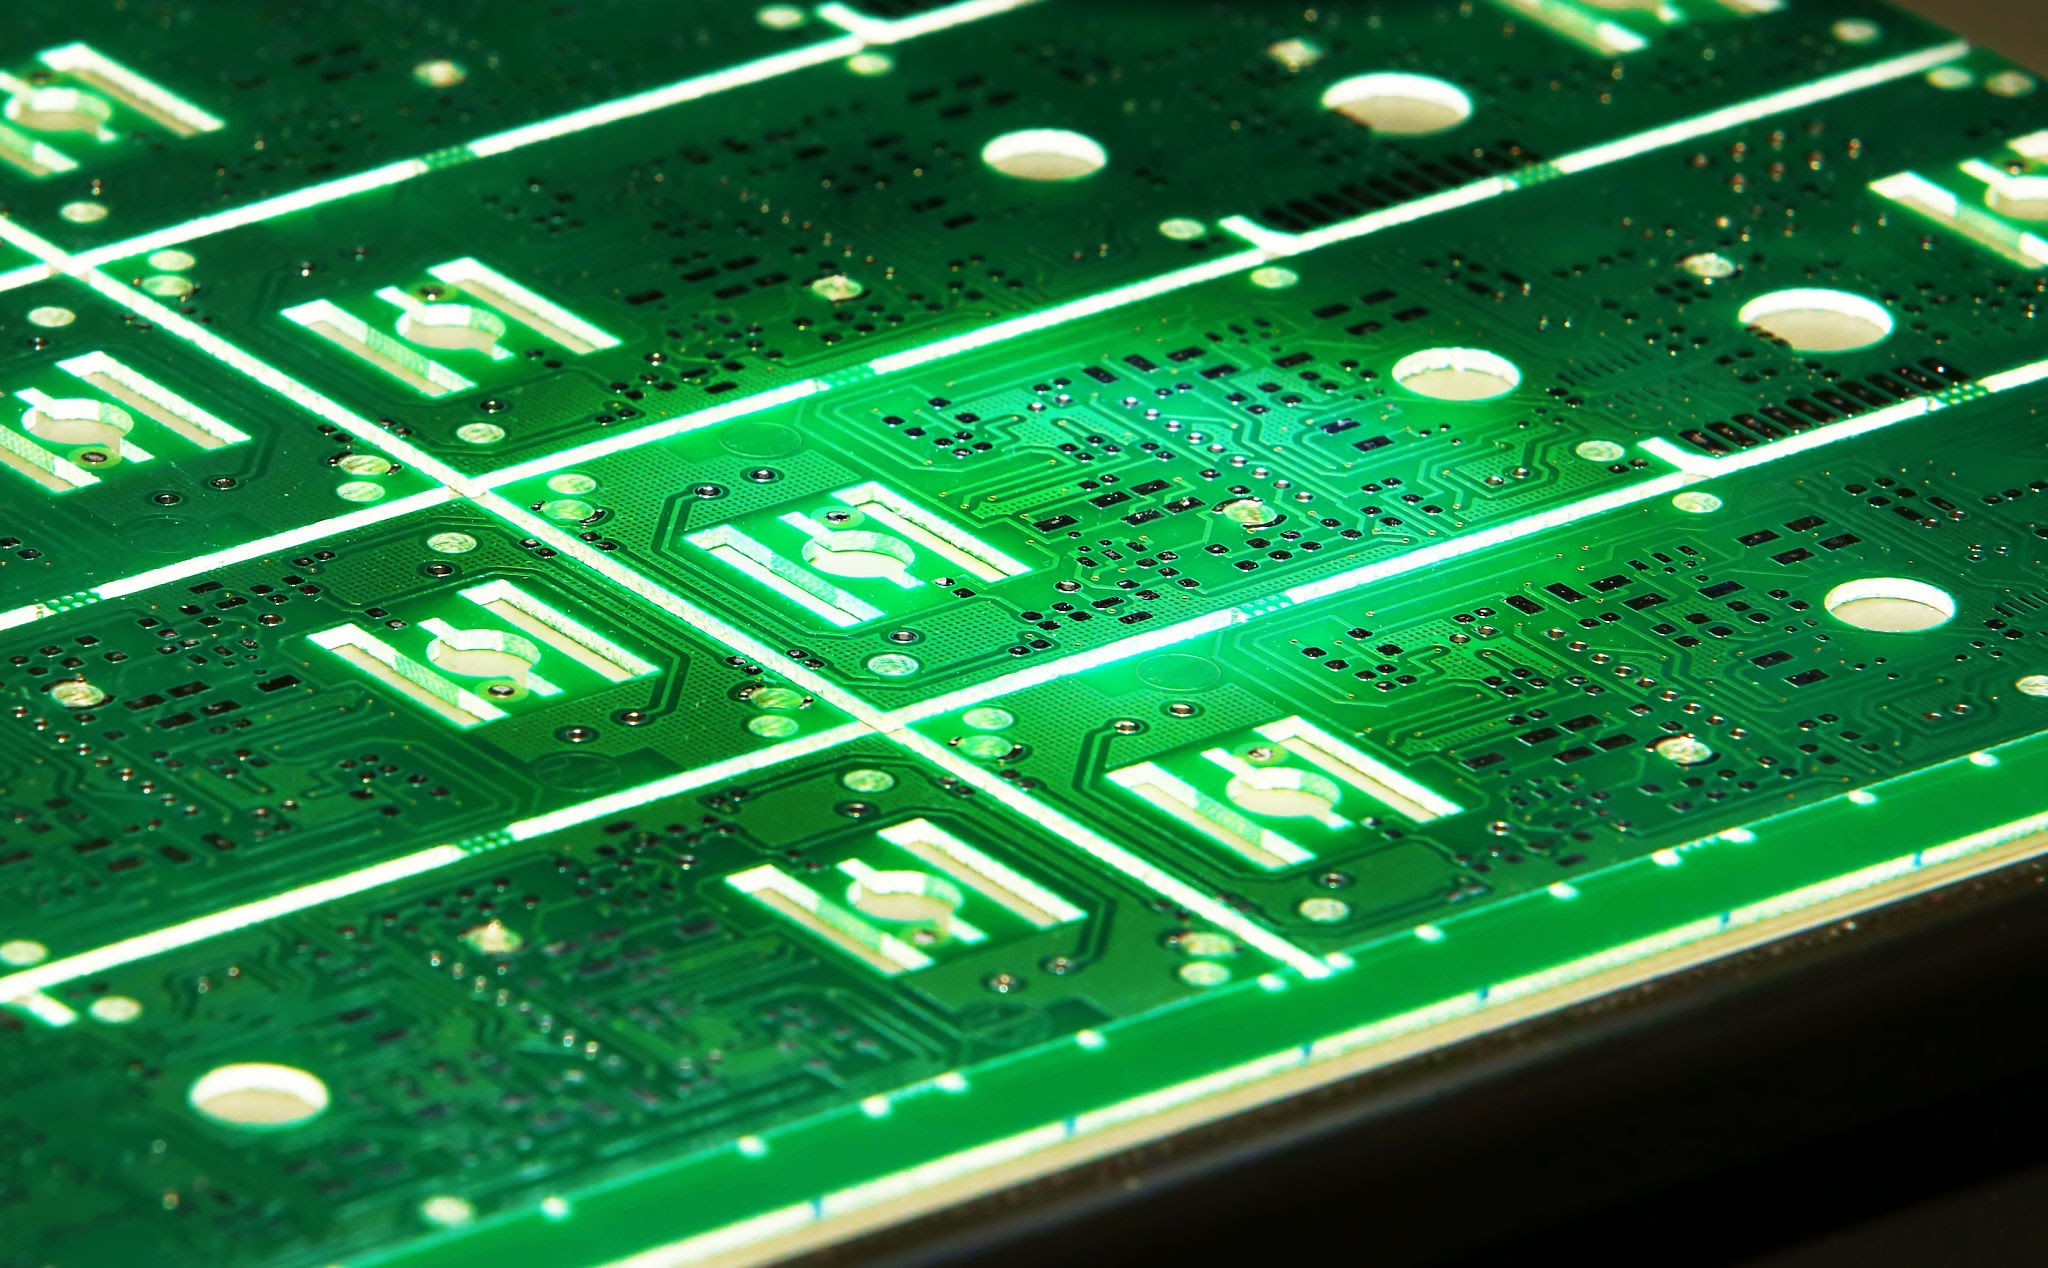
Purpose: PCB etching machines are used to selectively remove unwanted copper from the surface of a copper-clad board to create the desired circuit pattern.
Process:
The PCB is first cleaned to remove any contaminants.
A layer of photoresist is applied to the board’s surface.
A photomask, containing the desired circuit pattern, is aligned and placed on the board.
The board is exposed to UV light, which hardens the photoresist in areas not covered by the mask.
The etching machine sprays an etchant (e.g., ferric chloride) onto the board, which dissolves the exposed copper, leaving behind the circuit traces.
After etching, the remaining photoresist is stripped to reveal the clean copper traces.
Key Components: The machine includes a conveyor system for transporting boards, nozzles for uniform etchant distribution, and chemical control systems to monitor and control the etching process parameters like temperature, flow rate, and immersion time.
PCB Cleaning Machine: From Dragon Etching
Purpose: PCB cleaning machines are essential for removing various contaminants and residues from the surface of printed circuit boards.
Process:
The PCB is placed on a conveyor system that passes it through a series of cleaning stages.
Typically, the first stage involves a pre-cleaning step to remove heavy contaminants.
Subsequent stages employ ultrasonic cleaning baths, chemical cleaning agents, and brushes or nozzles to thoroughly clean the board’s surface.
Rinse cycles follow to remove cleaning agents and residues.
Drying mechanisms, such as hot air or infrared heating, ensure the board is completely dry.
Key Components: These machines consist of conveyor belts, cleaning tanks, brushes or nozzles for cleaning agents, drying mechanisms, and filtration systems to maintain the cleanliness of cleaning solutions.
PCB Developing Machine: From Dragon Etching
Purpose: PCB developing machines are used to develop the exposed photoresist on a PCB, revealing the circuit pattern.
Process:
The PCB is loaded onto a conveyor or rack system.
It is then passed through a developer bath that contains a developer solution (typically alkaline) which removes the unexposed photoresist.
The time of immersion and the temperature of the developer solution are carefully controlled to achieve the desired development.
After developing, the board is rinsed to remove any residual developer.
Key Components: Key components include developer baths, conveyor systems, and temperature control units for precise process control.
PCB Stripping Machine: From Dragon Etching
Purpose: PCB stripping machines are used in semiconductor manufacturing to remove photoresist or other unwanted layers from wafers.
Process:
The machine can use chemical processes, such as wet etching or solvent stripping, or mechanical methods, like abrasive brushing, to remove the unwanted layers.
The choice of method depends on the specific application and material to be stripped.
Key Components: Components may include chemical tanks, spray nozzles, and mechanical components for stripping, as well as exhaust systems to handle chemicals safely.
PCB Grinding Machine: From Dragon Etching
Purpose: PCB grinding machines are used in semiconductor manufacturing to grind and polish silicon wafers for flatness and smoothness.
Process:
Wafers are mounted on a rotating chuck.
Abrasive materials (such as diamond grinding wheels) are used to remove material from the wafer’s surface.
Precision control systems ensure uniform grinding and polishing.
Key Components: Key components include the rotating chuck, abrasive materials, and precision control systems for grinding parameters.
PCB Through-Hole Plating: From Dragon Etching
Purpose: Through-hole plating machines are used in PCB manufacturing to add a metal layer to through-holes in a printed circuit board, creating a conductive path.
Process:
The PCB is first cleaned and prepared.
It is then immersed in an electroplating bath containing a metal solution (typically copper).
An electrical current is applied to deposit the metal layer inside the through-holes.
After plating, the board is rinsed and dried.
Key Components: Components include electroplating baths, cathodes, anodes, and control systems for regulating plating parameters, as well as rinse and drying stations.
PCB Drilling Machine: From Dragon Etching
Purpose: PCB drilling machines create holes for component leads and vias in printed circuit boards.
Detailed Workflow:
Load the PCB onto the machine’s worktable.
Program the CNC control system with coordinates for the holes to be drilled.
Select the appropriate drill bits based on hole size requirements.
The machine’s high-speed spindle begins drilling holes according to the programmed coordinates.
Automatic tool changes may occur if different hole sizes are needed.
Once all holes are drilled, the PCB is removed from the machine.
Key Components: Precision drill bits, CNC control system, worktable.
PCB Routing Machine (PCB Router):
Purpose: PCB routing machines trim excess PCB material and separate individual boards from a larger panel.
Detailed Workflow:
Load the PCB onto the routing machine.
Program the CNC control system with the desired cutting paths.
The machine’s rotating routing bits follow the programmed paths, precisely cutting the PCB.
As each PCB is cut from the panel, it is moved to a separate collection area.
Key Components: Routing bits, CNC control software, worktable.